Test your app
Overview
Run your app in the Test tab of the Rabix Composer to test your app locally before pushing it to the cloud. App executions in the Rabix Composer are powered via an integration with the Rabix Executor, which runs workflows described using the Common Workflow Language (CWL).
Prerequisites
Before you can run your app in the Rabix Composer, you need to install:
Also, make sure to check the configuration of Rabix Executor integration.
Procedure
- Open an app in the Tool Editor or the Workflow Editor in the Rabix Composer.
- Select the Test tab.
- Double-click a file input port to set the file that will be used as an input. Or, drag files from the file tree and drop them on a file input port. Note that required file inputs are marked in orange.
- Double-click the node(s) to set app parameters. Note that you can only edit exposed parameters.
When providing values for an input port there are three different states in which the input port can be:
- Null - Before you click the Set Value button, the value of the input is null.
- Empty - If you click the Set Value button but don’t provide any value.
- Value- If you click Set Value and enter/set a value for the given input port.
- Click Run.
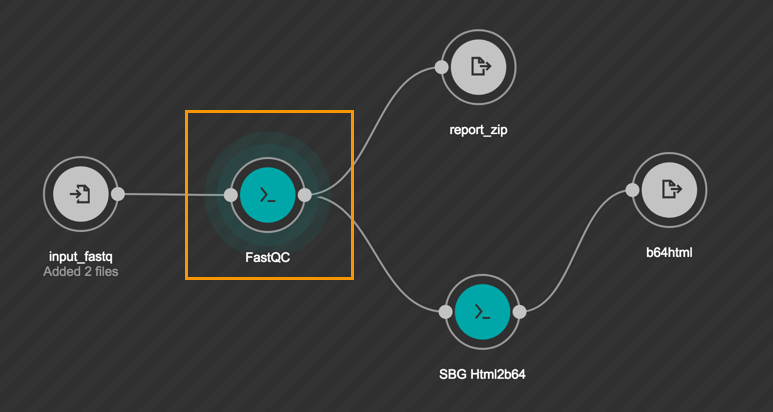
The app starts running and the terminal output displays at the bottom of the screen. If you can’t see the terminal output, click Execution in the bottom-right corner. The node that is currently being executed is highlighted in the visual representation of the app, as shown below.
If you want to push your tool to the Platform and test it there, learn more on how to do it.
Additional actions
The following actions are available via the controls on the right-hand side of the terminal window:
- Stop the app execution
- View the job CWL file
- Open the directory that contains app outputs
- See the error log produced by the execution
Import or export job CWL file
Export job
Rabix Composer allows you to export the job file that defines app input values, so you can import it when running the same app again and not have to set the input values manually. Note that this procedure won’t work if you change the ID values of your app input ports and try to import a file that has old or inadequate ID values.
- While on the Test tab, click the ellipsis icon and select Export Job.
- Choose the file format by selecting Export as YAML or Export as JSON. Alternatively, click the Export Code tab and copy the code directly.
- Select where you want to save your file.
Import job
- While on the Test tab, click the ellipsis icon and select Import Job.
- Click Select a File and navigate to the job file on your computer. Alternatively, click the Import Code tab to paste the code directly and click Import. App input values have now been configured.